Welcome to our first Getting Started post. Have you ever dreamed of implementing your own electronics projects, but you don’t quite know how to get started? Then you’ve come to the right place! This category intends to create a solid foundation for all kinds of projects in the area of electrical and computer engineering. Our goal is to build enough knowledge so that your start into the fascinating world of electronics can be as smooth and easy as possible. But it is not only intended for beginners. Believe it or not: even trained engineers with several years of professional experience sometimes lack basic knowledge.
In this post, we start with the very basics - your computer. Nowadays, it is almost impossible to do anything in engineering without a computer (hard to imagine that people had to build the first computer without the help of a computer! :). Many things have to be considered when setting up a machine, which will be the topic of this post. Shall we get started?
A computer for all needs
If you want to dive into the field of electrical or computer engineering it is inevitable to have a suitable computer. But what does that actually mean? What does a “suitable” computer look like in our field? You probably already have a computer and want to know if you can use it. Or you might want to buy a new one and get some ideas about what to buy. Maybe you want to build a computer on your own. If any of these apply to you, the following may be helpful to you.
This post covers several aspects. First, it explains the most important computer parts. We all want the best deal at the lowest price, right? Therefore, it is essential to understand terms like CPU, RAM, SSD, and so on to compare market offers. Second, we will discuss what kind of computer is required for most electrical and computer engineering tasks. Is it a high-end machine? Spoiler alert! It is not! The third part of this blog deals with the option of building a computer by yourself. This is a great option if you want to completely decide what goes into your computer and what not. After talking mainly about hardware aspects, the fourth part will introduce the three major operating systems, namely Windows, Mac OS, and Linux. Which one is most commonly used by engineers? There is also the possibility of using multiple operating systems, which will be explained in the last part.
Please feel free to skip to the part that is of interest to you. If you have additional thoughts, we welcome your comments below.
Computer parts
Every desktop computer contains the same key parts like a processor, memories, a mainboard, and some sort of cooling. Each part can vary greatly from computer to computer, both in performance and price. The price range for a usual personal computer ranges from a few hundred euros up to a few thousand. Of course, there is no limit to the price. When you choose a computer you need to answer two questions: Does the performance justify the price and does the performance fit my requirements? For both questions, it is useful to be able to assess the power of a computer. In the following, you will get an overview of the most important components inside a computer and learn how to evaluate them.
CPU
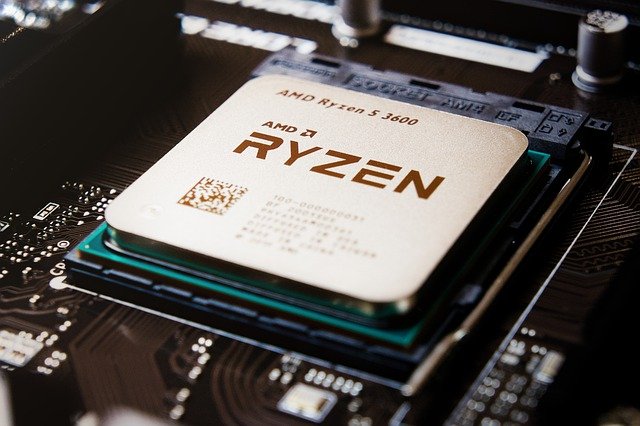
Let’s start with the brain of the computer, the Central Processing Unit (CPU). As the name suggests it processes the operations (or “instructions”) that are defined by a computer program. Often the term processor is used as a synonym, however, be aware of the fact that there can be multiple processors inside a computer. If you read computer advertisements you probably come across phrases like “Quad-Core CPU at 3.6 GHz”. Indeed, these are two properties that describe the performance of a CPU.
“3.6 GHz” means that this CPU can theoretical process 3.6 billion instructions per second. So it basically describes the speed of the processor, and it is often referred to as the frequency of the CPU. Obviously, the higher the frequency the better the performance. In the past, this was a simple metric to decide which processor is the better one. However, at some point, a physical boundary was reached and the frequency could not be raised further. Manufacturers had to come up with other ideas to further improve their CPUs. One of them was to introduce parallelization with multi-cores.
Progress in technology made it possible to put multiple processors on a single chip and divide tasks between them. This task, however, is not as simple as it first sounds. There might be dependencies between tasks or tasks might require the same information or resource. Imagine you want to make pizza. You have to put the cheese on the pizza before you put it in the oven and everyone needs to read the recipe. One friend helping you is useful. Ten friends, however, will probably not make the pizza finish faster. The same applies to processors. Double the number of processors does not lead to twice as fast execution.
Nowadays, every CPU for desktop computers consists of multiple cores. The following question arises: Is a processor with higher clock speed and fewer cores better than a processor with lower clock speed and more cores? This becomes a non-trivial question since it depends on your application. In the extreme case, a program makes no use of parallelism at all. Then, the multi-core feature is useless.
DDR SDRAM (RAM)
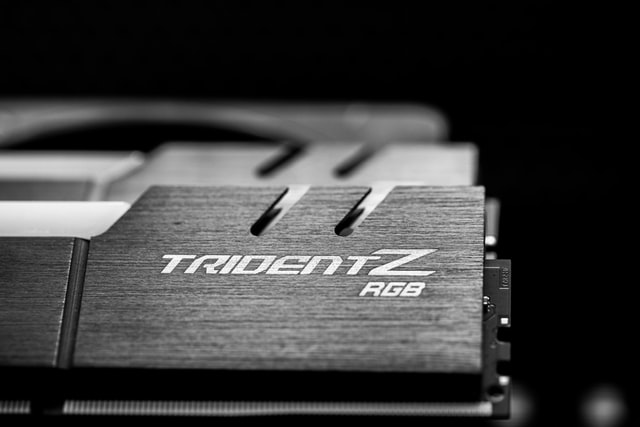
A computer combines multiple memories, which differ in size and access speed. Random Access Memory (RAM) is a medium-sized memory with medium speed. It is used to store application data on a short-term basis. For a fast computer, it is crucial to provide enough RAM since otherwise, the data has to be stored on a slower drive which results in a noticeable slow performance. Additionally, the data rate and latency of the memory are important. Data rate describes the amount of data that can be written/read in a given time. It is usually expressed in a frequency unit (e.g. MHz). Latency describes the time you have to wait until you get the data out of the memory. Even though data rate and latency sound similar, they are not the same. I am sure this will come up again in a later post. Short-term means for this memory that the data is only valid as long as the computer runs. As soon as you turn it off, all data will be lost. This is the main reason why you should properly shut down a computer to make sure all data is stored in a long-term memory, which is explained next.
HDD and SSD
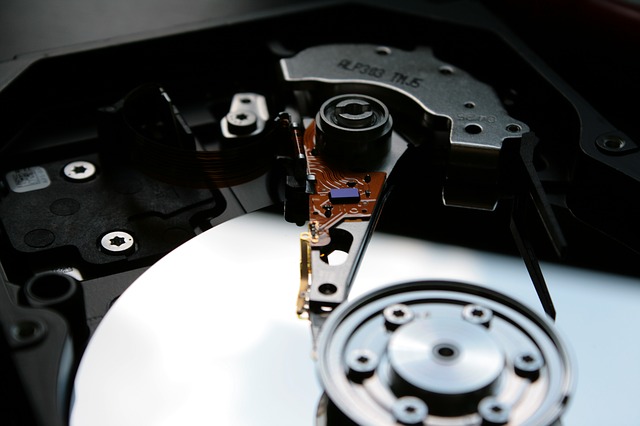
Nowadays two different kinds of long-term memories find their way into home computers. A Hard Disk Drive (HDD) was the only choice in the past, whereas a Solid State Drive (SSD) is a newer and faster memory type. HDD is a mechanical storage where some platters are spinning and a read arm reads and writes the data. The mechanical part tends to make noise and the platters set a limit on how small the drive can be manufactured. Moreover, the motor that spins the platters requires additional energy and it takes time until the read arm is moved to the right location.
Compared to that, an SSD is not mechanical and typically uses flash instead (do not worry if you do not know what it is; it’s basically like the SD card in your phone, or a USB drive). So, there is no noise of spinning platters, the SSD can be very small and light (very good for laptops!), the energy consumption is lower (also good for laptops!) and an SSD is faster than a HDD. Sounds almost too good to be true, right? Why are HDDs still used then?
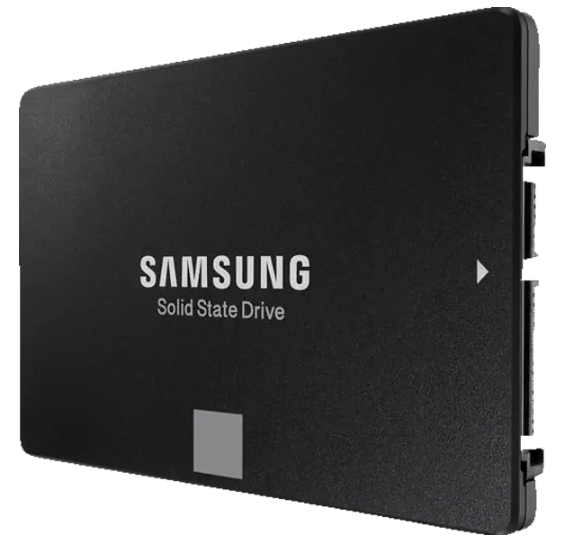
From early days there exists the myth that SSDs would die early. But this is nothing you have to concern about as a normal user. One concern, however, is the price. As of today, SSDs are more expensive, so you get less capacity for the same amount of money. This is why SSDs are often combined with HDDs. The SSD is used for important things like your operating system and the HDD is used for data that is rarely used and where you do not care so much about the speed. If you want to see a race between a computer that boots from an SSD and one that boots from an HDD, you can watch this video.
Graphics Processing Unit (GPU)
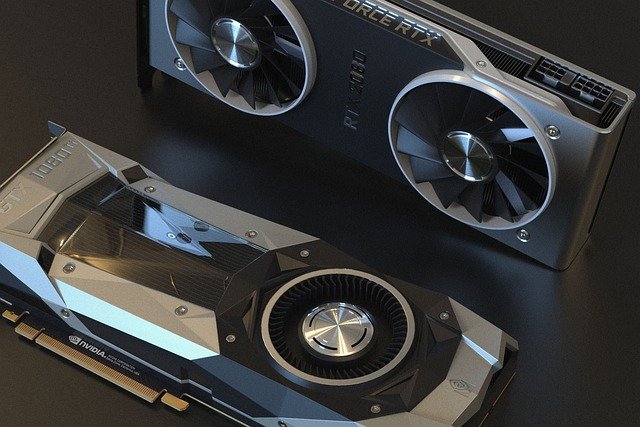
As the name suggests, the graphics processing unit (or graphics card) was developed for handling extensive graphics applications like computer games. Over time, they also became attractive for computationally intensive applications such as Bitcoin mining or neural networks (these cool algorithms that can detect your face or your cat or …). This is because the design of GPUs is optimized for matrix operations. A graphics card is not a mandatory part, so it is possible to save some money. Be warned! A graphics card is often the part that makes a computer super expensive. In the case you want to save that money, you can also buy a CPU with an integrated graphics unit. Meanwhile, these included graphics units are quite good and it is also possible to play light games with them. Graphics cards are also of interest if you plan to have a setup with many monitors (three or more). Most people I know use one or two monitors at home. This should be fine with the integrated graphics unit.
Mainboard
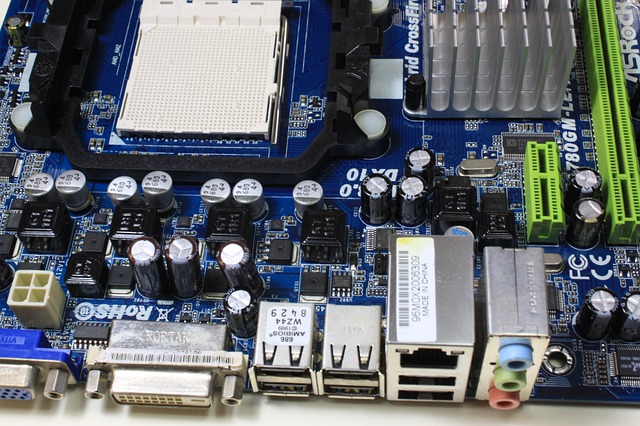
The mainboard or motherboard is the place where everything is put together. The mainboard is a printed circuit board that allows all the components of the computer to communicate with each other. Here, you can plugin in the parts mentioned above as well as a power supply and cooling fans. It also provides external interfaces like USB ports.
Is a high-end computer necessary?
No! Definitely no! But well … It depends! If you just want to get some experience in coding, you technically don’t even need to have full-blown computer. There are even small pocket-sized computers, such as the Raspberry Pi, that can be used like a “normal” computer. However, if you plan to work with algorithms that process a huge amount of data or are computationally expensive, such as machine learning, you require a computer with higher performance. In electrical engineering, often powerful algorithms are used to design circuits. If you plan to design you own chip, then having a powerful computer can speed up the process (by the way, in case you haven’t seen it already, we also have another category, Digital Design, where we will talk about how chips are designed). But still, it does not have to be a high-end computer. As an example, I paid 447€ for my computer plus 127€ for a graphics card. The latter I mostly use for gaming so you can ignore it. I will give a more detailed description in the next section.
Build your own computer
Building a computer on your own is not as hard as it sounds. The challenging part is to choose parts that match your application as well as your budget. The rest is more or less putting some cables together. I will not go into detail for the latter part since you can find enough videos (like this) on Youtube. Please, understand that the market situation can change rapidly, so the following is more an example and the situation could have changed already when you read this post.
The first thing I usually do is to search for something like “Best PC build under 500€ 2021” and read a few articles. Many people periodically scan the market for good deals. This is a good way to get a market overview. Then I usually start with the selection of a CPU. As mentioned earlier it is not easy to directly compare CPUs. So-called benchmarks try to provide an overall score considering multiple aspects. You can use websites like www.cpubenchmark.net to compare CPUs. Additionally, a mark/price ranking is provided as shown in the picture below.

In this case, I would probably choose the AMD Ryzen 3 3200G as it provides enough power at a reasonable price and includes a graphics unit, so an additional graphics card is not required. Processors are usually available as “boxed” or “tray” versions. The boxed version is intended for end-users and includes a heat sink and fan. The fan is mostly not the best available, but in my experience, it is always fine so I would not bother and just buy the boxed one.
Next, a mainboard is required. Make sure that you choose one that matches the socket of the processor which is in this case an AM4. An example could be the B450M PRO-VDH MAX. It offers enough interfaces like 4 DIMM slots for your RAM, 4 SATA connectors for your HDD and SSD drives, in total 6 USB 3.2 ports, VGA, HDMI, and DVI-D for your monitors.
As for RAM, I would use 2 x 8 GB DDR4 memory. Note that you have to match the specification of the motherboard and CPU. If the CPU requires DDR4 you cannot use a RAM with DDR3. Also, pay attention to the clock speed. The higher the speed, the better the performance as long it is supported by the CPU and motherboard. Additionally, there exists a maximum number of RAMs as well as a maximal amount of storage. For B450M PRO-VDH MAX, this is 4 RAMs with a total of up to 128 GB. By the way: 2 x 8 GB memories usually perform better than a single 16 GB memory since they can be accessed in parallel. If you want to save money you can start with a single 8 GB RAM and buy a second one later if you need to.
As I said earlier, I recommend combining SSD and HDD drives. The SSD is still more expensive so I use it only for the operating system and programs that I use frequently. 256 GB were enough for me so far. Data that I do not use that often like pictures of my last vacation, I store on an HDD. Here I bought 1 TB. If you find out that either the SSD or HDD is not enough you can buy a third drive later.
Lastly, you need a power supply, a computer housing and some thermal paste. For the supply, you need to sum up the power requirements of your parts. Since there is not so much price difference in low power segments, you can just buy a 400 W power supply. This is enough even you add a low- to mid-range graphics card. As for housing, you can almost choose whatever you like. Keep an eye on the form factor and the provided interfaces. A housing with preinstalled fans makes the assembling easier for you. The thermal paste needs to be put between the processor and the heat sink to guarantee optimal cooling. Sometimes the fan already has some thermal paste on it. Then, you do not need additional paste.
Here are the parts I described above:
| Part | Price |
|---|---|
| AMD Ryzen 3 3200G | 114€ |
| B450M PRO-VDH MAX | 76€ |
| Corsair Vengeance LPX 2x8GB DDR4 3000Mhz | 86€ |
| Silicon Power SSD 256 GB | 33€ |
| Seagate Barracuda HDD 1TB | 36€ |
| be quiet! 400W power supply | 42€ |
| Sharkoon VG5-V housing | 39€ |
| Thermal paste | 5€ |
| Overall | 431€ |
Note: These are today’s prices, which can change every day and differ between suppliers. Please do not understand it as an explicit recommendation. It is more an example to show you that it is not necessary to have a super high-end computer. Of course, you can spend more if you like, but you can also downgrade a bit and get even cheaper. For things we plan to do in this blog, a computer as shown in the table will be sufficient.
Windows, Linux, Mac?
So far we talked only about the hardware and not the software running on it. The main software on a computer is the operating system. It has control of your system and manages all your programs such as your browser, your email client or your music application. Windows is probably known by everyone, but there are also other operating systems available which got more and more attention over the past years. How do they differ? And which one is the best?
Microsoft Windows is installed on most machines. Many people like to use it because it is very simple and intuitive. It does not require any IT knowledge. A huge advantage is that most software is available for Windows. Especially for gaming, Windows should be your choice. Also, the office packet with Word, Excel, Teams and so on is very powerful. This makes it very interesting for companies as well. Consequently, most office computers run Windows. On the downside, Windows is not free to use. You need to buy a license to use it legally. Since Windows is present on so many machines, and its users often do not have IT knowledge it is the target of many computer viruses. This is reinforced by its complexity which leads space for security issues. Therefore, do not click on dubious links or download things from untrusted websites (this applies to all systems though!).
Mac OS is an operating system developed by Apple. It is shipped with all Apple computers and is intended to be used with Apple products only. So, it is not an option if you want to build your own computer. There are ways to install it on other machines, but this can be very tricky. Mac is different from Windows, but still very easy and intuitive to use. In my experience, it runs more smoothly than Windows and looks nicer. While Windows sometimes hangs up, I never experienced this on a Mac. A Linux-like terminal (we come to that soon) lets programmers work efficiently. The disadvantage is the price of Apple products and the limited choice of products.
Linux is a family of open-source operating systems. There are many so-called Linux distributions available which all are build on top of the Linux kernel, which is something like the heart of Linux. The kernel is combined with different software like a graphical interface to build a distribution. So, internally all distributions work the same, but they appear differently to the user. Linux is very popular among software developers. It is free to use, the source code is available and you can customize it as much as you like. Since everyone can check the code, report failures and even contribute, it is a very stable and safe operating system. A terminal (we come to that in a later post) offers a way for users to efficiently control of the whole system. Linux also has a huge community, where you can always ask questions or chat with people about your projects. As a disadvantage, it might take longer to get used to a Linux system. This depends on the distribution you choose. Ubuntu is a well-known distribution that is also suitable for beginners. Arch Linux is probably the total opposite of it. In its basic version, you do not even have a graphical interface. In our blog, we use the Manjaro distribution. It builds on top of Arch Linux but is way easier to use. It tries to offer you the possibilities of Arch and at the same time keep the simplicity of Ubuntu. The advantage and disadvantage at the same time is that Manjaro will receive the newest software releases. Advantage because you have new software features early. Disadvantage because you are likely to get undiscovered bugs. However, Manjaro maintains its own software repositories and will test software that is released by Arch before you will get it.
Of course, you can go with any of the three operating systems. For the long term, I recommend going with Linux. Yes, it requires some time and reading to get used to it. At some point, however, it will make things easier and more fun. Free to use, open-source, highly configurable and a great community are things Windows or Mac OS cannot compete with. The next posts in this category will help you to get started with Linux. If you prefer to use another distribution other than Manjaro this is also fine. Our instructions will be for Manjaro but usually, they are the same for all distributions or they can be translated easily.
As an option, you can install multiple operating systems on one computer. For example, Windows for gaming and Linux for programming. How this can be achieved is explained in the next section.
Dual Boot
Even though Windows has a bad reputation among many developers (sometimes it really sucks!) it still has its advantages. Especially in gaming, it is still the system you should have. A question might pop up in your head! Can I have both, Linux and Windows? Also, if you already have a computer with Windows running on it you might want to keep it and install Linux next to it. Here is the good news. It is possible and not too difficult. Though, “not too difficult” does not imply that it is not complicated. In fact, when I installed a dual boot system the first time I had no clue what I was actually doing. However, there are good tutorials you can just follow step by step without understanding the details. An example is this tutorial.
At Bits&Volts it is our goal to make you understand everything. The issue at this point is that to completely understand everything a lot of detailed knowledge is required. Let’s save our energy and keep things simple for now. What happens when you press the on button on your computer? First, the BIOS (Basic Input-Output System) starts. The BIOS is a small program stored on the mainboard and its task is to initialize your hardware such as storages. After that, it looks for a bootloader that is responsible to load the operating system. When you install Manjaro you replace the Windows bootloader with a bootloader called grub. This new bootloader is able to handle multiple operating systems. Grub will stop the boot process and ask you which operating system to boot. The process is very simplified in the following picture.
What you have to do for installing Manjaro alongside Windows: (Tutorial):
- Windows has to be installed
- Resize your partitions
At the moment, the whole disk space is dedicated to Windows. So, you need to shrink the space for Windows and make it available for Manjaro. How you distribute the space is up to you. Manjaro recommends at least 30 GB of storage, but 128 GB or more are nice to have. - Create a bootable USB
An easy solution is to install Manjaro from a USB stick. Download Manjaro and create a bootable USB stick. Note that you cannot just copy the downloaded file on the USB stick. It has to be in a special format so that it can be recognized by the BIOS. The tutorial explains how to do it. - Boot from USB
This might require you to enter the BIOS menu. The BIOS has an order how it scans through the devices for a bootable one. You have to make sure that the USB is checked before the drive where Windows is installed. Otherwise, you will end up booting Windows. To enter the BIOS menu you have to press a button during booting that depends on your hardware. Sometimes F11 sometimes ESC. You can check it in your mainboard’s manual or look onto the normal boot screen. Usually, at the very beginning after turning on the computer a screen shows the instruction on how to enter the BIOS. Unfortunately, the time the screen is shown is often too short to be able to read it. You can use your phone’s camera and take a video. - Install Manjaro
Follow the instructions and select the storage where you want to install Manjaro. - Reboot
After a reboot, you should enter the grub boot menu. - Configure grub (optional)
Grub offers a lot of options. You can choose the background, select the time it waits for a user to enter the operating system and choose the system it shall load automatically without user input.
If you run into any problems ask your questions in the comments below! We will try to help you out!
Summary
For the first post, we covered already a lot of things. If everything went well you should now have a running computer with Manjaro installed. A quick summary of the covered topics:
- The main computer parts: CPU, RAM, SSD, HDD, Graphics Card, Mainboard
- A high-end computer is not required. 400€ - 500€ are enough
- A sample computer configuration was shown
- Windows is a very popular system (for normal users only)
- There exist many different Linux distributions
- Developers prefer to use Linux (we use Manjaro)
- Windows and Linux can be installed at the same time
In the next post, we will bring Linux to life. In a hands-on lesson, we will show the basic usage of the terminal. Stay tuned and follow us on Twitter.
Back to top ↑